Patient Preparation
How to Prepare for Your Mercury Filling Removal Appointment
September 11, 2026
MercuryFreeDental Editorial Team
Most of the anxiety patients feel before mercury filling removal comes from not knowing what to expect. A well-prepared appointment is smoother, less stressful, and produces better outcomes. Here is what to do in the weeks, days, and hours before your procedure.
Two to four weeks before: verify the essentials
Confirm the protocol
If you have not already verified the specific protective measures your provider uses, do this before your appointment is finalized. Ask about rubber dam use, sectioning technique, high-volume evacuation, air filtration with activated carbon, and whether supplemental oxygen is available. A provider who follows SMART protocol will answer these questions without hesitation.
Our full appointment checklist covers all 20 questions worth asking. Print or save it before you call.
Nail down the cost
Request an itemized written estimate before you schedule. It should separate: removal fee per tooth, SMART protocol premium per tooth, replacement material per tooth, and any consultation or diagnostic fees. If you are using insurance, ask the office to submit a pre-authorization request so you have written confirmation of coverage before your appointment.
Verify your HSA or FSA balance if you plan to use either. Confirm the practice accepts your payment method.
Handle logistics
Clear your schedule for the appointment day — plan not to return to demanding work or activities afterward. If you are having sedation, arrange a driver now, not the day before. If you have children, arrange childcare for the appointment day and potentially the day after.
If you are traveling to see a specialist, book accommodation near the practice — within 10–15 minutes is ideal. Look for a place with a kitchen or kitchenette so you can prepare soft foods for the evening after your appointment.
Two to three days before
- Prepare your question list — write down anything you want to confirm or understand before treatment begins. Having it written avoids forgetting under the mild stress of being in the dental chair.
- Gather your dental records — if you have recent X-rays from another practice, arrange to have them transferred. This saves time and avoids repeat radiation at the new office.
- List your medications and supplements — especially anything that affects clotting: aspirin, NSAIDs, warfarin, fish oil, vitamin E. Your dentist needs to know about these before administering anesthesia or performing any procedure.
- Stock your kitchen — buy soft foods you can eat without chewing on the treated side: yogurt, smooth nut butter, applesauce, eggs, soup, protein shakes, soft bread. You will appreciate having these ready when you arrive home.
- Complete intake paperwork — if the practice sent forms in advance, complete them now so you arrive ready.
The day before
Get adequate sleep. This is practical advice, not a platitude — patients who arrive rested are calmer, communicate more clearly, and have a more positive experience. Dental anxiety is common and legitimate; fatigue amplifies it.
Set out your documents: insurance card, HSA/FSA card, medication list, question list, ID, and any completed paperwork. Confirm your appointment time and the exact address of the practice.
If sedation is planned, confirm the fasting requirements with the practice — some protocols require no food or liquids after midnight, others only require avoiding solid food for a few hours.
Morning of your appointment
- Eat a light meal 2–3 hours before, unless fasting is required. A small meal prevents low blood sugar, which can cause lightheadedness during the procedure.
- Take your regular medications unless instructed otherwise by your dentist.
- Wear comfortable, loose-fitting clothing. Avoid turtlenecks or anything tight around the neck.
- Avoid wearing perfume or strong scent — dental staff with latex gloves and equipment can be sensitive to scents in an enclosed operatory.
- Arrive 10–15 minutes early to complete any remaining check-in calmly rather than rushing.
Questions to confirm when you arrive
Before the dentist begins, it is appropriate to confirm a few things directly. A confident, protocol-driven practice welcomes this:
- "Will the rubber dam be placed before any drilling begins?"
- "Is the air filtration unit running in this room?"
- "Will the HVE be positioned at the tooth throughout the procedure?"
- "What is the plan for my appointment today — which fillings, and in what order?"
What to expect during the procedure
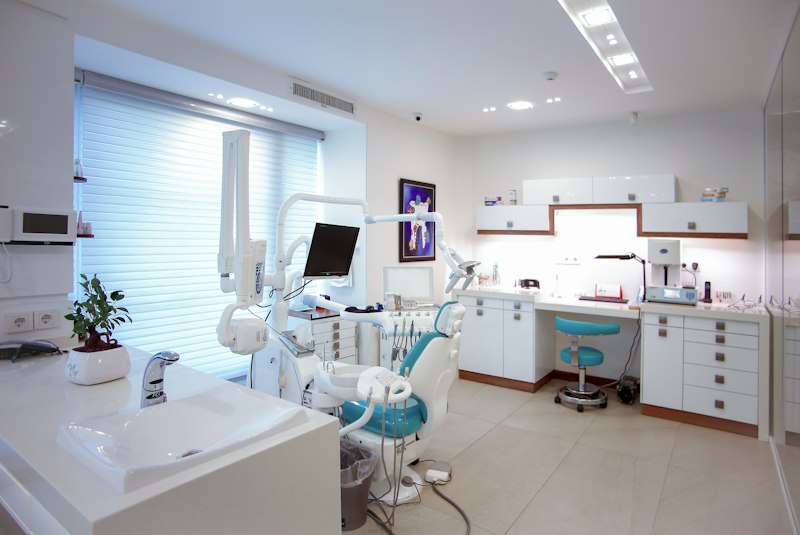
With SMART protocol, the appointment will feel more involved than a standard filling replacement. Expect:
- Application of rubber dam before any drilling begins
- Local anesthesia — the injection is the most uncomfortable part for most patients
- Sounds and sensations of drilling, though you should feel no pain
- Suction near your mouth throughout the procedure (this is the HVE)
- Pauses between sections as the dentist lifts out pieces of the old filling
- The replacement restoration being placed after the tooth is cleaned and prepared
If you feel pain during the procedure, raise your hand to signal the dentist. More anesthesia can be administered. You should not experience pain during drilling.
Before you leave the office
- Schedule your follow-up appointment — typically 2–4 weeks post-procedure
- Get the practice's after-hours contact number in case of questions or concerns that evening
- Ask for documentation of what was placed — material type, tooth location — which your regular dentist will need
- Clarify any bite issues before leaving — if the bite feels significantly off, it is easier to adjust now than to return
For what to expect in the days after your appointment, see our recovery guide. For a comprehensive preparation checklist you can print, see our full appointment checklist guide. Patients interested in the broader holistic dentistry context around preparation and recovery will find additional resources at Holistic Dental Care.
Key Takeaways
- Confirm protocol, cost, and logistics 2–4 weeks before your appointment — not the day before
- Prepare your question list, gather records, and stock soft foods 2–3 days before
- Eat a light meal before your appointment unless fasting is required for sedation
- Arrange a driver only if sedation is planned — local anesthesia alone does not require one
- Confirm protocol elements with the dentist before they begin
- Before leaving: schedule follow-up, get after-hours contact, obtain procedure documentation
This article is for educational purposes only and does not constitute medical or dental advice. Always follow the specific pre-appointment instructions provided by your dental provider.
Frequently Asked Questions
What should I eat before a mercury filling removal appointment?
Eat a light meal 2–3 hours before your appointment, unless instructed otherwise for sedation (some sedation protocols require fasting). Avoid foods you cannot eat while numb — you will not be able to eat immediately after the procedure until the anesthesia wears off, typically 2–4 hours. Stock soft foods at home for the rest of the day: yogurt, soup, scrambled eggs, smoothies.
How long does a mercury filling removal appointment take?
With SMART protocol, a single filling removal and replacement typically takes 60–90 minutes. Two to three fillings in one session often run 2–3 hours. Longer appointments require more focus from both patient and dentist, which is part of why most SMART practitioners prefer to limit sessions to 3–4 fillings maximum.
Should I arrange someone to drive me home?
Only if you are having sedation (nitrous oxide, oral sedation, or IV sedation). Local anesthesia alone does not impair your ability to drive — though many patients prefer not to schedule demanding tasks for the remainder of the appointment day. If you are unsure whether sedation will be used, confirm with the practice before your appointment.
What should I bring to my appointment?
Bring your insurance card, any HSA or FSA payment card, a list of current medications and supplements (especially blood thinners or anticoagulants), recent dental X-rays if you have them, your written question list, and a form of payment for any out-of-pocket portion. If the practice sent intake forms, complete them in advance rather than in the waiting room.
⚠ Educational content only.
This article does not constitute medical or dental advice.
Always consult a qualified dental or medical provider before making treatment decisions.